All Posts By

Sherry Borsheim

I'd love to share my organizing expertise with you! Want an easy way to get the latest on all things organizational? Click the SEND MY KIT button at the top of this page to receive a FREE organizing kit.

How to Organize Office Supplies

By Blog, Business Organizing, Expert Articles, Free Articles, Home Office Organization No Comments


Every office has office supplies and typically the supplies are all over the place.  I know this, because I see this in almost every office that I’ve organized.  Very few know how to organize office supplies. How many times have you gone looking for the printer cartridges, couldn’t find them, even though you know you have them somewhere.  So you run to the store to buy more and a week later you find the missing cartridges.  How about the 150 pens and pencils stuffed in your drawers?  Just because you can buy in bulk, doesn’t mean you will actually use them before they get too old, dry up, or you don’t like writing with them.


Too often, I see boxes and boxes of old file folders, paper, and torn hanging files that are so dusty and smelly no one wants to use them.  I’m telling you, it’s time to be realistic about how many office supplies you really need to have on hand.  I want you to recycle or toss any office supplies that you don’t use, don’t love, or aren’t useful.  PURGE, PURGE and PURGE!


Whether you have a small supply area or a large supply room, the time wasted looking for supplies and the cost of duplicate purchases costs you time and money.  I guarantee that once you master how to organize office supplies, you will feel a sense of calmness and peace in your office, because you know what supplies you have, and they are at your fingertips when you need them.


Your office is “prime real estate” for being productive in your work and/or business.  Keep your office supplies to a minimum and contained in an area that you can easily access.  More and more people are going paperless and using fewer office supplies these days.  Now is the time to consolidate and assess what supplies you actually need.  Just because you spent money on it, is not a reason to keep it.  Let it go, pass it on!

 How to Organize Office Supplies:

First Step: Group like things together


In the video I made for you, I shared many examples and organizing products that I use when “organizing office supplies.”  The first step to an office supplies system is to group like things together.  Some broad categories are paper, files, notebooks, stationary, adhesives, binder dividers, pens, felts and pencils, mailing supplies, printer cartridges, cables, and blank DVD’s.


Second Step: Purge


If you have duplicate items, like three staplers, then use the “in another room” box or put them in the donate box.  Anything that is broken, you don’t use, smells or is not functional, get rid of it.  If you have more than 40 pens and pencils, donate the extras to a school, daycare or charity (they must be in new condition).


Third Step:  Designate a space


Decide where you are going to store and organize your supplies.  Keep like things together.


Fourth Step:  Containerize & Label 
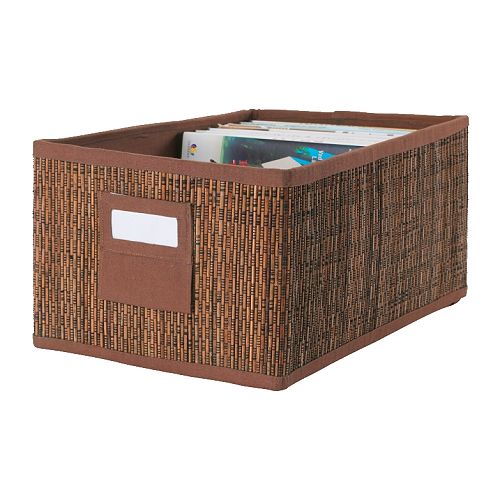
 

how to organize office suppliesTime to get your office supplies system together! For paper, use metal stacking trays to maximize vertical space.  Use functional containers or drawer units to contain pens and adhesives.  Each space is different, so customize how you want to containerize and give yourself easy access to your office supplies.  After you’ve designated and space and/or containerized the office supplies, make sure you label the containers, drawers, stacking trays or shelves to identify the supply zones.  This also helps to put things back in the right place and to let you know when you need to re-order.
What is your favorite tip on “how to organize office supplies”?

Reclaim Shelf Space and Organize Your Books with a Kindle!

By Blog, Business Organizing, Closet Organizing, Expert Articles, Free Articles, Home Office Organization, Home Organizing, IABO Weekly News, Quick Organizing Tips, Resources No Comments
organize

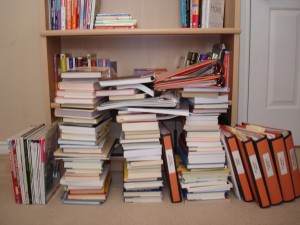
Before my Kindle

Are you tripping over piles of books on the floor?   Is your bookcase bulging at the seams with no room for all your new books?   How much time and money are you wasting finding a book or on duplicate purchases? Are you like me, someone who loves to highlight and tag your books for future reference?

Are you feeling a little nervous about letting go of your precious books?  I love my books too and when we went to Hawaii a few weeks ago, we decided to buy an e-book reader and test it out on our vacation.  We also thought it was about time to get with the times.  Someone said to me, everyone in Hawaii has an e-book reader by the pool or on the beach.  So we thought we would give it a try.

Having an e-book reader also let’s you travel light.  Instead of packing three books each, I only took one book with me and Glen had his new Kindle.  The first day by the pool, I looked around and sure enough, 80% had some form of e-book reader.  Also, my husband kept saying to me, you’re going to love reading from the Kindle.  It’s easier to hold and much lighter than a pocket book, and the wind doesn’t flip your pages around.  Oh, and another cool feature is you can change the font size, which for some of us, and I won’t mention any names, is a bonus when the fine print is too small to read.

So, after two days, I finished reading my paperback and I was going back and forth, do I buy a second e-book reader or do we share?  We still had another 12 days in Hawaii and I planned on reading several more books.  So we decided to go to Best Buy and buy another Kindle.  A few days later, we found a vending machine at the Sheraton Waikiki that sells high-end electronics – iPods, iPhones, iPads, Kindles and other items you wish you had while on vacation.  How cool is that?

Anyways, all I can say is, why did I wait so long?  I absolutely LOVE my e-book reader!  I can highlight, makes notes and refer back to my notes easier than I could highlight in a book.  No more yellow highlighter to fiddle with, its super light to hold and read, no glare from the sun, long battery life (5-7 days), love the larger print size, and I read faster because I’m not straining my eyes to read the small print.  We opted to buy the basic e-book reader because we don’t need a ton of fancy features and a data package.  We just wanted an easy way to read and organize our books.  We can even share our books with each other.

organize

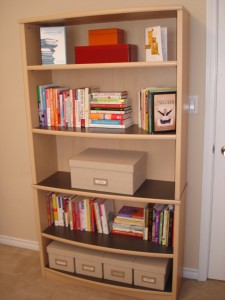
After my Kindle

Four weeks later, I’m in my office and I notice a very full bookshelf.  I thought I had purged as many books as I could and for some reason I was holding onto way too many books.  Now that I have my Kindle, I don’t need all these books.  As you can see from the before photo, the bookshelf is bulging at the seams.  I want you to know that I practice what I teach.  So, I approached my bookshelf with a new frame of mind.  Knowing that I have my Kindle to store all future books, I asked myself “what’s the reason I’m holding onto all these books?”  Here’s my answers:

  • It’s out of print and its a book I refer to sometimes.
  • I wrote the book or I’m a contributing author.
  • The book is a key resource in my business or personal life.
  • I want to read this book.
  • I paid a lot of money for this hard cover and I should keep it.
  • It’s a classic and I want to keep it.
  • A friend published a book and it was a gift.

Here’s the new question I asked myself because I now have a Kindle, “what books can I let go of, write down in my OneNote file, and if I ever want to refer to it, I’ll buy it on my Kindle?”  Here’s the after photos of all the books that I am letting go of and if I want to refer to one of these books someday, I will purchase it on my Kindle.  The cost of buying it a second time, if I do, is a fraction of the cost of the space that is now available in my office.  I have room to breath and I don’t need to go out and buy a new shelving unit with doors (which I was planning on doing) because I didn’t like looking at all these heavy books.

If I can do it, so can you.  Go ahead and purge your bookshelf.  If you’re like me and thinking that a Kindle costs too much, think again.  I spent less than $90 and the freedom and flexibility I now have is a wonderful feeling.  It’s much easier to take my Kindle with me wherever I go instead of a thick book.  No more “making room” for books on my bookshelf. The stress I released and the space I reclaimed on my bookshelves and in my office, priceless!

The Best Tips to Organizing Microsoft Outlook

By Blog, Business Organizing, Expert Articles, Free Articles, Home Office Organization, Home Organizing, Organizing Microsoft Outlook, Quick Organizing Tips No Comments

organizing Microsoft OutlookHow many emails do you have in your Inbox?  100, 1500, 5000, or 20,000+?  The larger the number the more time you waste and increased stress.  Although many dream of getting to ground zero and only processing today’s emails, the reality of this happening is not high on the priority list. Organizing Microsoft Outlook is easy with all the new features in Outlook 2010.


Go ahead and look at the number in your Inbox.  Do you feel like you have a 100 pound weight sitting on your shoulders or are you smiling because you are one of the rare few who only has this week’s emails waiting for you to deal with?  The number of emails sitting in your Inbox affects the speed of your Outlook searches and how much time you waste scrolling past the same email over and over.

 How to Start Organizing Microsoft Outlook

The key to getting a handle on your emails, improving your response time and staying on top of critical actions and time-sensitive tasks is to develop an approach to process your emails both from your computer and on your mobile devices.

1. Synchronize all your devices so you only process an email once.

For small business who don’t have access to a company server, set up a Google Business Account and use Google apps to connect your Outlook, phone and iPad to access your email, calendar, contacts and tasks from all your devices.  You can even access your Gmail account from anywhere and the sync will update your Outlook the next time you are at your computer.    If you only want to sync your email to your phone and iPad, you can use the free Gmail account, (note that you won’t be able to access your calendar, contacts and tasks).

2. Use the Conversation Feature – in Microsoft 2010 when Conversations is turned on, messages in your Inbox and other email folders can be organized by Conversation and Date.  This is handy when there are several emails in a conversation because you can delete all the previous emails and only keep the latest conversation.

To turn on or off Conversations – On the VIEW tab, in the CONVERSATIONS group, select or clear the SHOW AS CONVERSATION check box.  Next, click ALL FOLDERS.

3. Set up your Action and Reference Folders

Action Folders – are for emails that require action

Reference folders – are for emails with no action required.  You keep these emails to refer to them later, are permanent records or are for tax and legal requirements.

When you create your Action folders, type a period “.” in front of the action folder name.  Adding the period changes the sort order a moves your Action folders to the top of the list and your “Reference” folder under your Action folders.  You can also use numbers 01, 02, 03, 04 if you prefer to organize your Action folders in a certain order. Suggested Action folders:

..This Week (there are two periods here)

.Delegated – Deb

.Leads

.Parked

.Projects

.Receipts to Print

.Travel

.Waiting For/Pending

To create Reference folders, create a main folder called “Reference” and then second level folders using broad categories (example. Accounting > Budget 2012)

Separating your action and reference emails helps you gain control on what requires your attention.  No more wasting time scrolling past emails that don’t require your attention.

Arrange your emails by Conversation, From – In Outlook 2010, on the VIEW tab, in the ARRANGEMENT group, click one of the arrangement options.  One of the fastest ways to process your emails is to arrange by Conversations.

Organizing Microsoft Outlook emails is easy when you customize it the way you want to process your emails.  Now that you have your new action and reference folders set up, you can use the next four steps to process your Inbox and get it to ground zero, or close to zero depending on your preference.

Organizing Microsoft Outlook with F.A.S.T.

Use the F.A.S.T. Workflow Decision Making Process to quickly decide what the next action is.  With the F.A.S.T. process, you have four choices:

File – file emails in your Reference folders that have no action.  Drag and drop emails into the appropriate Reference folder.  A word of caution, at some point you will need to clean out these folders or move them to your Archive folder.

Act – these are emails that require action by you.  Drag emails that require action

Schedule – get your appointments into your calendar and save as an ALL DAY EVENT or at a SPECIFIC TIME.  If you are keeping the email to refer to at the appointment, simply drag the email to your calendar and all the info will be saved in the appointment.  Delete the email.

Toss – Read and delete whenever possible.  Be ruthless with the delete key.  You can set up your Deleted Folder to delete emails manually by you, monthly or whatever time frame you prefer.

If your inbox is overflowing with emails and organizing Microsoft Outlook seems like a daunting project, here’s a fast way to get your Inbox close to ground zero immediately.  Create an Action folder “.OLD EMAILS.”  Next, drag emails that are older than 7 days into the new .OLD EMAILS folder.  You’ll need to schedule time in your calendar to deal with this old emails.  This strategy gives you instant relief since you only have 7 days of emails to process.  You’ll be motivated to process the old email folder.

 What have you found was key to your organizing Microsoft Outlook? Join us in the Comments below!